Baby Dresser Drawer Dividers

For the dresser that is holding the clothes in the baby room, I made my own drawer dividers. Super easy, does not take much time at all!.

All you need:

  1. Cardboard
  2. Extra fabric
  3. Hot glue gun

Measure out the length and width of each drawer, then cut the sizes out of cardboard that you need. I then hot glued the fabric on. After that was done, I measured out thirds and did cuts into opposite sides of each so I could slide them onto each other. Makes it easy to divide up the pants, onesies, etc!!!


Forest Animals Crib Mobile

I had seen a variety of felt mobiles on pinterest and I had a plethora of extra felt. All the ones I saw weren’t quite the color schemes I wanted (and I had the supplies), so I decided to make my own forest animals to go with our woodsy/green theme in the room. The mobile base itself was easy to purchase (and inexpensive) from Amazon (although I may end up switching it up for a wooden one later on). All I needed otherwise was the felt, embroidery thread and stuffing which I had (and some wooden accent beads I had as well). If you’re not crafty, there are some amazing ones you can find on Etsy to purchase! Check them out- there’s a ton of options.

Baby Room Pillow

Onward with baby room/nursery projects. We have less than 4 weeks left (+/- since you can’t predict!) so we’re finishing up the room! (And I’m finishing up my crafty parts of it). For the recliner (amazing and so comfortable), I wanted an accent pillow…and my husband wanted green. Thus with some scrap fabric, made a fantastic pillow cover that I can take off and wash and brings a couple different greens into the room! And yes, the painting in the background I did as well- Lava Lake, Big Sky, Montana.

Hanging Baby Closet Dividers DIY

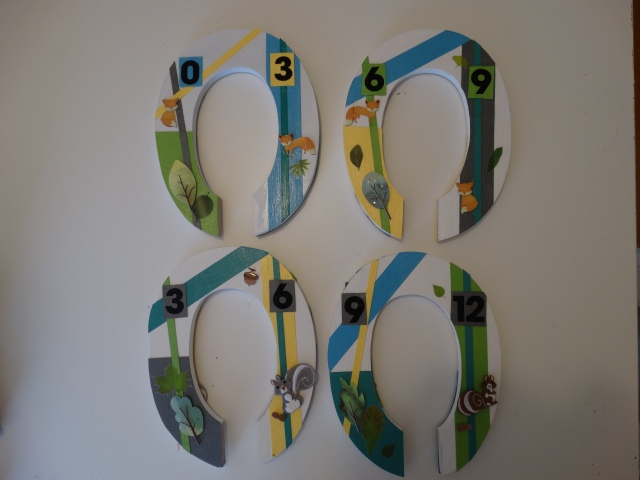
So I’ve been doing some homemade things for upcoming February (February 2nd! Eek! Really seems not that far away now). I had come across various closet dividers on Etsy and pinterest. I wanted to make my own vs buying them, but it was hard to find a standard hanger to decorate or use. So I went along the lines of http://www.twotwentyone.net/baby-closet-dividers/ using wooden Os I purchased at Michael’s craft store.

dsc02947

For these, I got wooden Os at Michael’s and had a lovely friend cut the bottom for me since they have real tools vs a hack saw that I have which would have taken awhile. Then I just painted the cut edges white to match the rest of the O. Rest of the materials needed:

  1. Decorative thicker scrapbook paper
  2. Scissors
  3. Mod Podge and foam brush to use
  4. Stickers (again, found them in the scrapbook section).
  5. Sticker numbers

We have a woodsy theme going for the baby room, so I stuck to foxes, squirrels and leaves for the decorative stickers on these. For colors, we’re having some pops of green. But you can definitely make these work for you and whatever theme you want to pursue (since again, there are infinite sticker and paper options!).

This was a great project in front of the tv while I was doing laundry.

I started doing a side at a time, and by the time I got through I could repeat on the other side since the Mod Podge dries quick. The scrapbook paper you want thicker so it isn’t wrinkling up on you as you put it on, but doing a later of Mod Podge under and over does the trick. If the stickers don’t have enough of a sticky backing, a little extra Mod Podge helps as well. I found it helpful to layout what I wanted with each one, making each side almost a mirror of each other.

Again, pretty easy to put together and you can definite make it whatever you need it to be for your own theme!

dsc02942dsc02948

Shell Bar/Serving Tray

DSC02549

What to do with extra shells?

I’m somewhat of a packrat in that I tend to keep things for potential craft projects. Well, I had collected shells ever since I was younger and I’m sure plenty of you have collected shells on vacation. What to do with them? Repurpose them into something useful and fantastic looking- a shell serving tray. I made two at the same time as gifts.

I will admit, not the cheapest gift, since you end up using a LOT of EnviroTex to seal the shells in. However, it is unique and turns out well.

How to….:

Continue reading

Paintings…at Perrier Liquor

IMG_2446
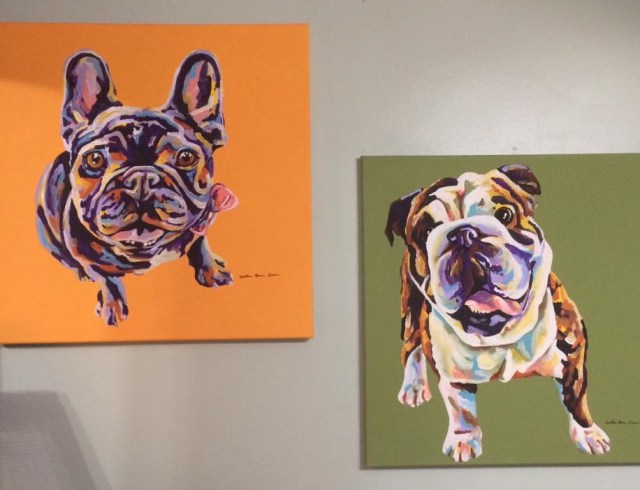
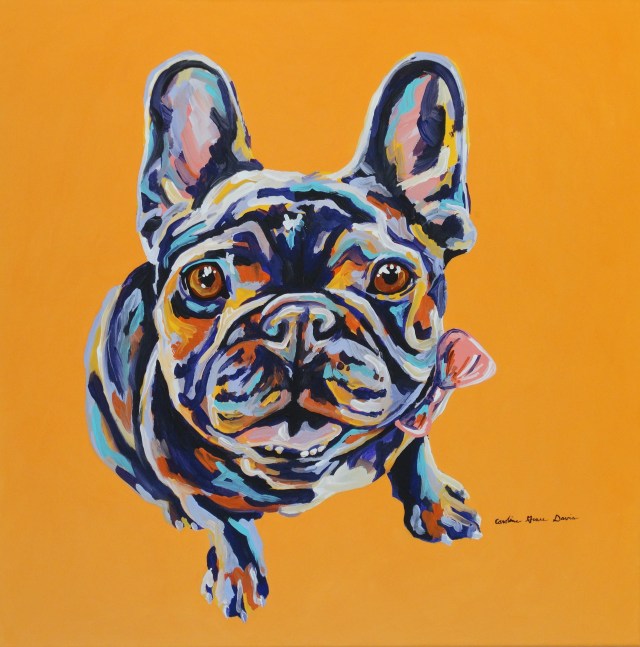
Horray! Paintings up (and available for purchase!!!!!). Since most of my recent paintings are custom portraits, I wasn’t able to have any of those awesome ones, but these are some others. Check them out at Perrier Wines & Liquors on Grand Avenue in Saint Paul, MN (by Ace Hardware)…and buy some booze while you’re at it.

IMG_2445


Fleece Blanket Presents!

Every year I make my co-workers gifts for all or part of their presents for the holidays. Last year I did the coasters (see posting from last year of cat/dog silhouette coasters). This year…. FLEECE BLANKETS.

Basic materials: fleece blankets (purchased at a brick and mortar store), embroidery thread, and felt! Basically every time we were sitting on the couches watching TV, I’d work on them.

I wish I had pictures of all of them (I think it was eighteen total), but of course I didn’t remember until I gave them to everyone!